Welcome to 3D Claims on CloudPano
Get started in 4 simple steps
1. Download the CloudPano Mobile App
Use the mobile app to capture 360° photos and build your first tour.
iOS (Apple)
Download from App StoreAndroid
Download from Google Play2. Connect Your 360° Camera or Use Mobile Rotator
CloudPano works with most major 360° cameras, image files, or your smartphone with a rotator.
Compatible with:
- Ricoh Theta (Z1, V, SC2)
- Insta360 (One X, X2, X3)
- CloudPano Mobile Rotator
- Direct 360° photo uploads
Connection Steps:
- Turn on your 360° camera and enable Bluetooth/WiFi
- Connect to the camera's WiFi in your phone settings
- Open the CloudPano app and tap "Connect Camera"
3. Create Your First Virtual Tour
Once connected or ready to upload:
- 1Tap Connect Camera (if using a device)
- 2Tap Create Tour
- 3Capture or upload photos
- 4Click Upload when finished
- 5Click publish, make sure to connect to the internet by turning off wifi and publishing to your account
3.5. Add Info Spots (Optional)
Enhance your tour by adding information points to highlight damage, moisture readings, or important details:
Mobile & Desktop Options
You can add info spots from either your mobile device or later from your desktop computer.
Mobile
- 1While in your tour, tap the pencil icon in the side menu
- 2Tap where you want to add an info spot
- 3Choose an icon style (info, star, camera, etc.)
- 4Add text, upload photos, or link to other scenes
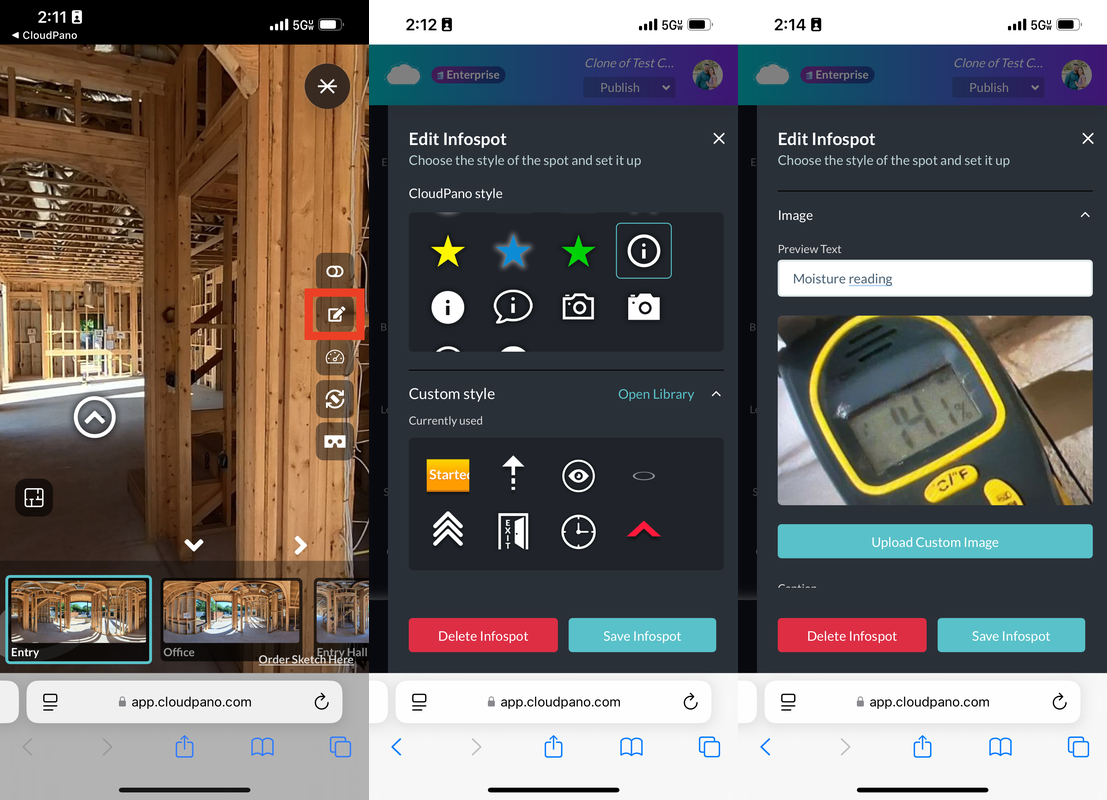
Desktop
- 1Log in to your CloudPano account on desktop
- 2Open your tour and click "Edit Tour"
- 3Click anywhere in the scene to add an info spot
- 4Customize with text, images, or measurements
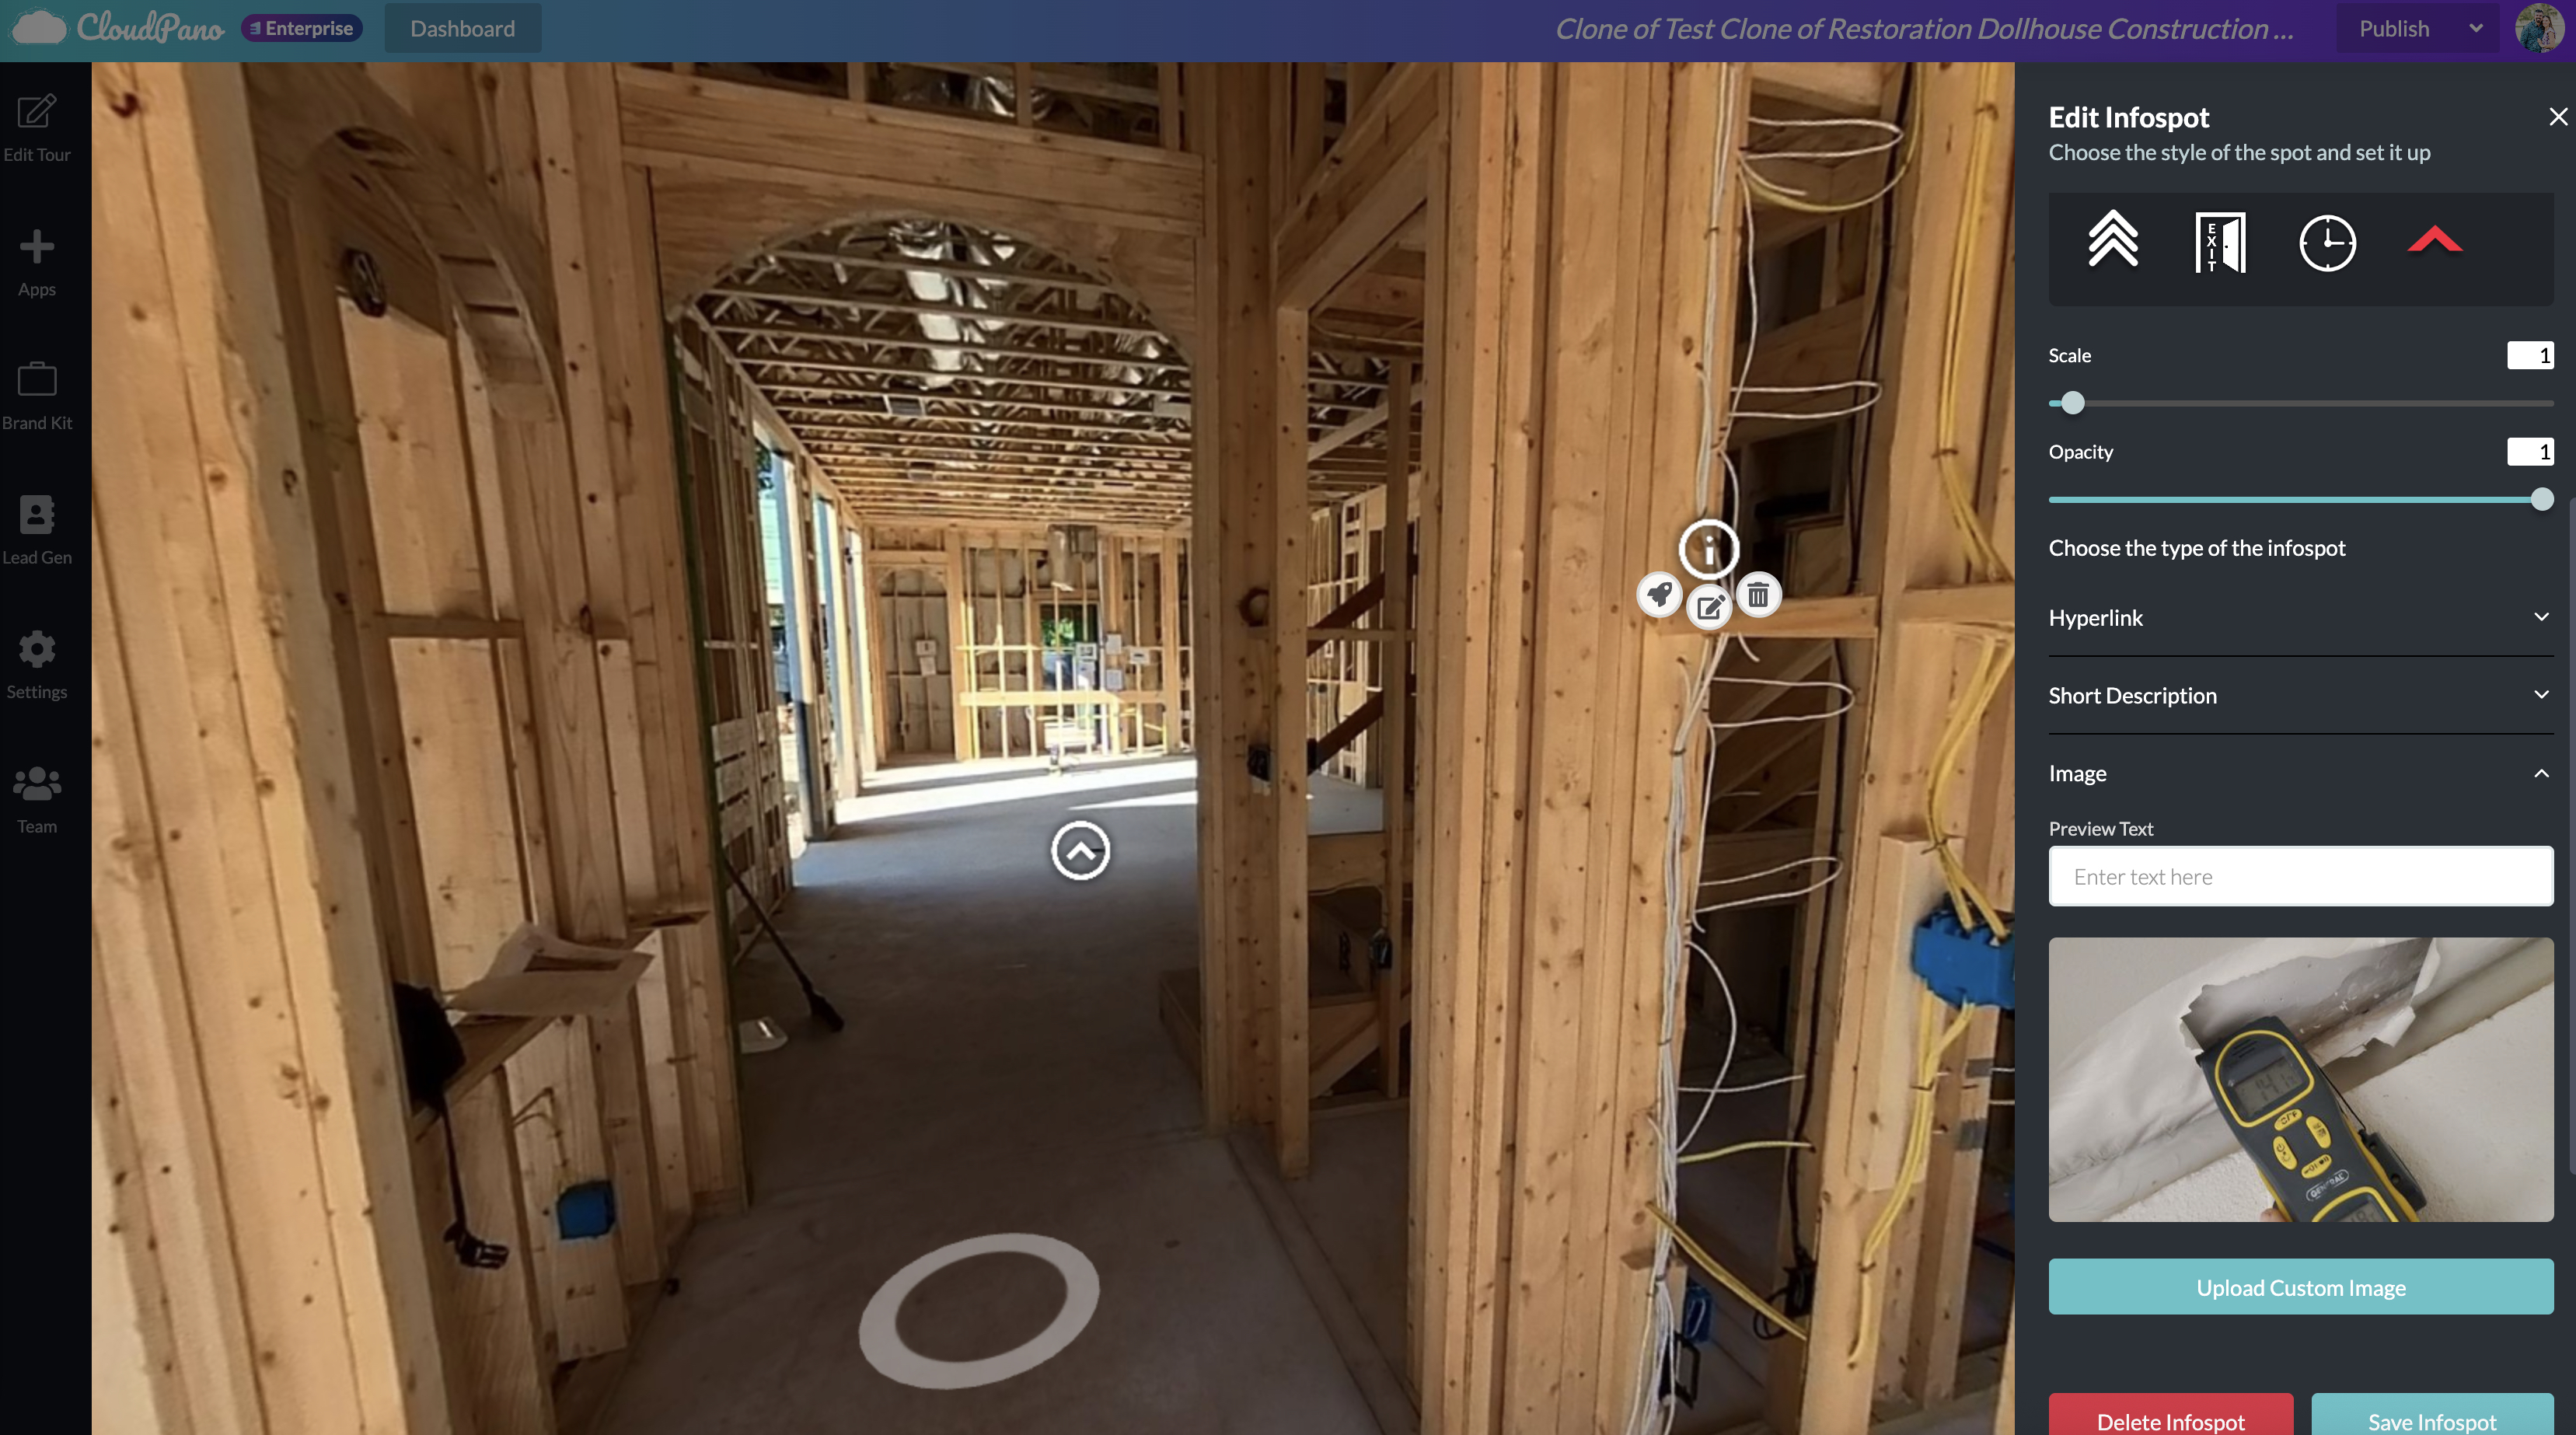
Pro Tip: Use info spots to document moisture readings, damage areas, or measurements that will be helpful for creating accurate sketches and estimates.
4. Order Your Floor Plan Sketch
After your tour is uploaded, order your floor plan sketch for .esx or .fml files:
- 1Go to: https://3dclaims.cloudpano.com/order-sketch
- 2Paste your Tour URL
- 3Complete the form and submit
Find the "Order Sketch" button in your tour
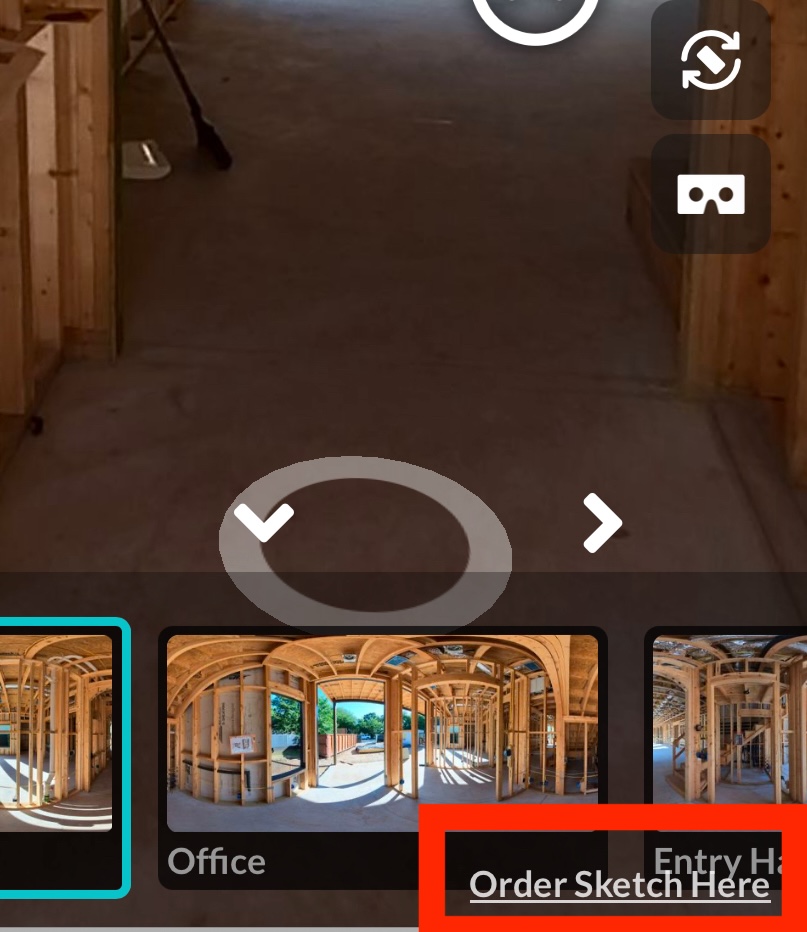
After publishing your tour, you can click the "Order Sketch Here" button directly in the tour interface.
Complete the order form
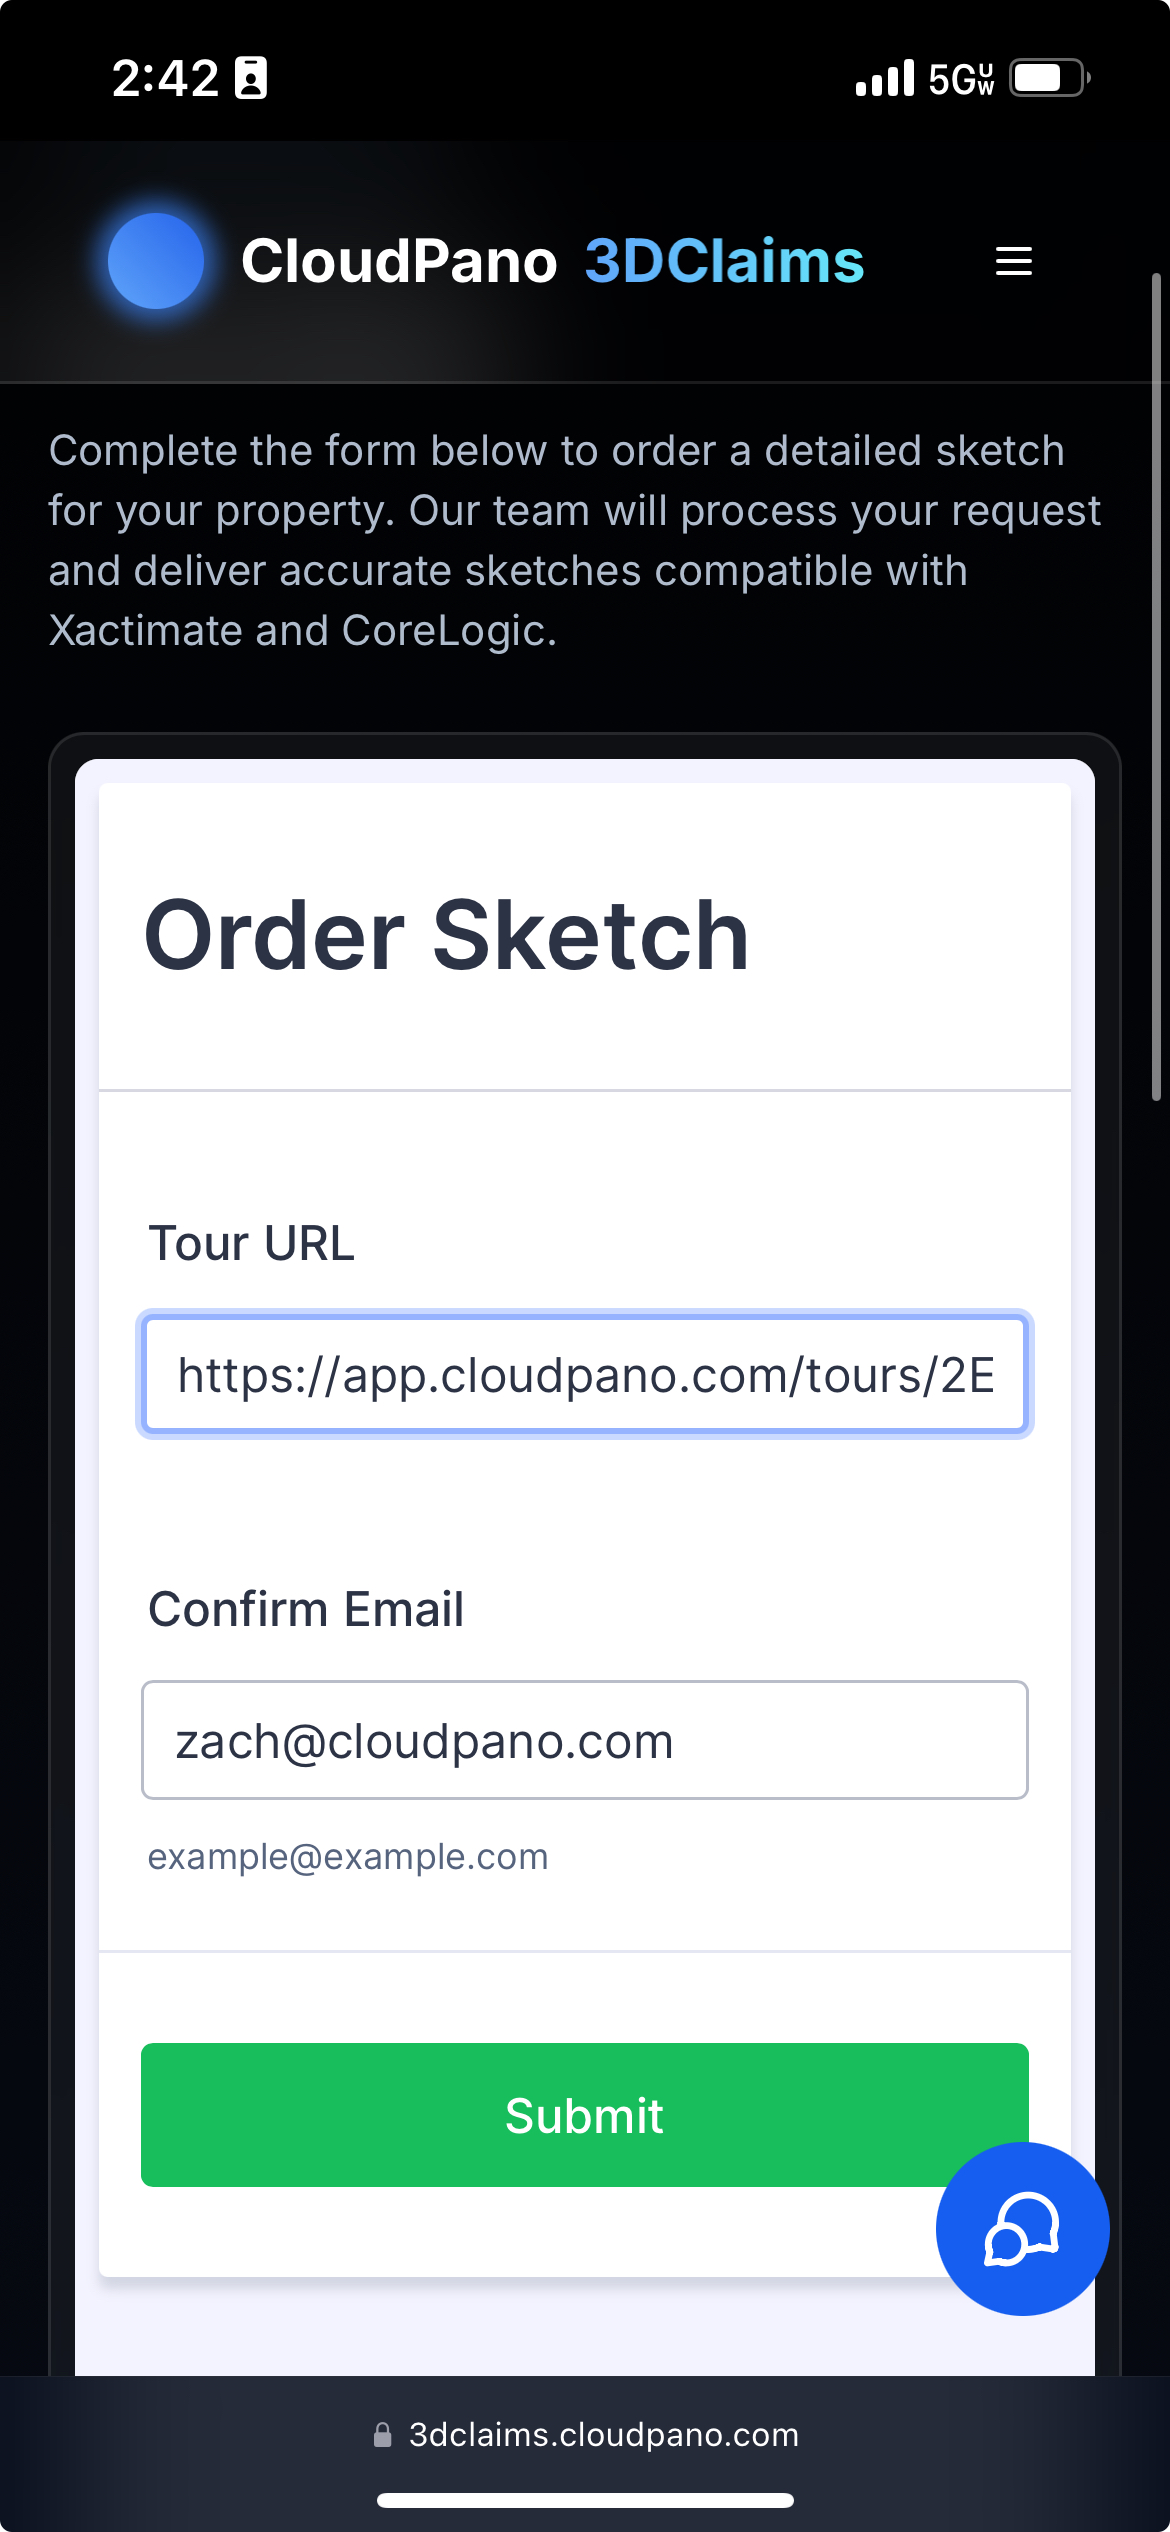
Enter your tour URL and confirm your email to submit your sketch order.
✅ We'll process and deliver your sketch ASAP.